Lectures
A lecture stores a set of subjects, letting students (and the graph preview) focus on just the subjects covered in that lecture. By clicking on the “Lecture” button (1) in the top-right, you can select which lecture view do you want to preview.
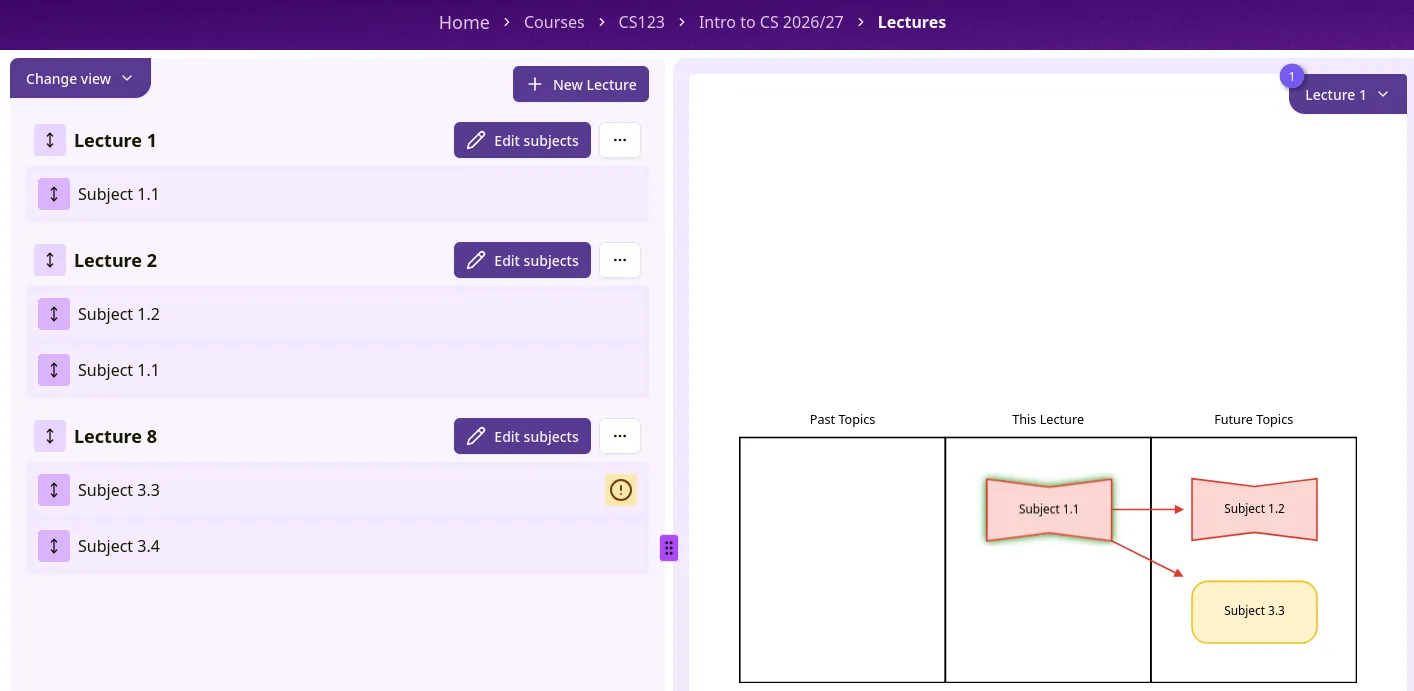 Figure 1: Lecture view
Creating a lecture
Section titled “Creating a lecture”Open a graph’s Lectures tab and click “New Lecture”. Give it a name.
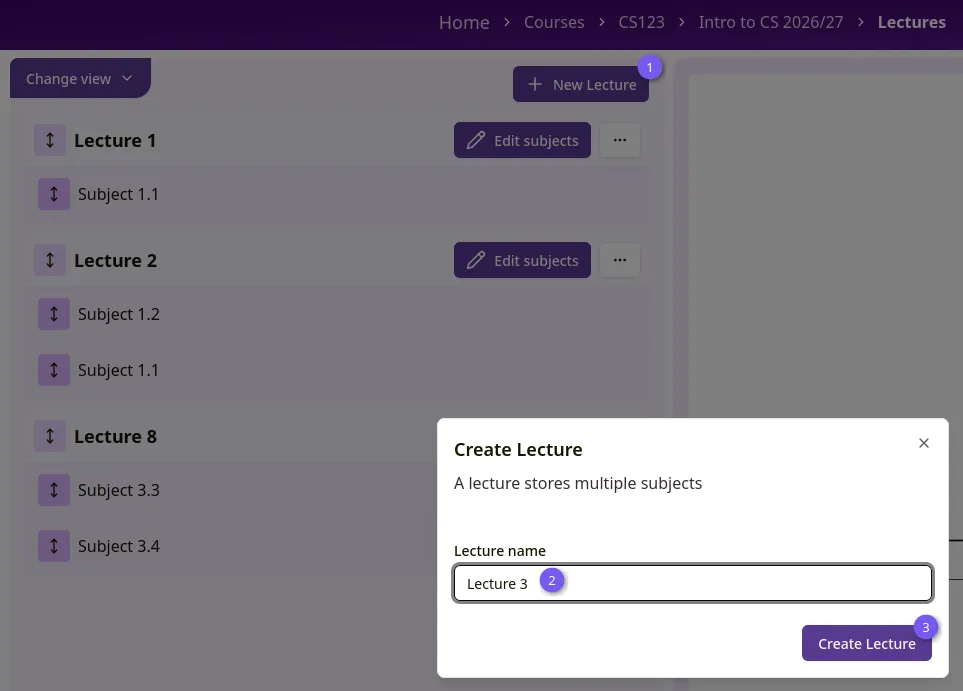 Figure 2: Create lecture
The lecture list
Section titled “The lecture list”Lectures are shown as cards you can drag using the handle (1) to reorder.
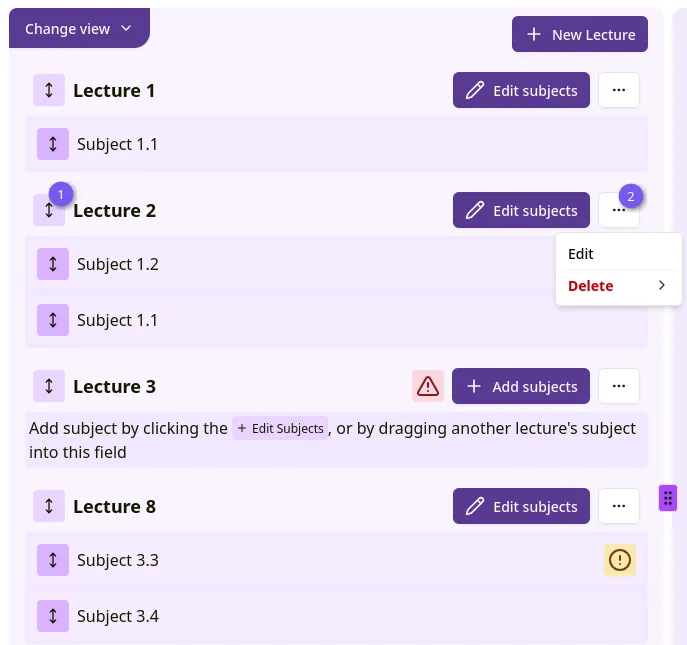 Figure 3: Lecture list
Each card’s ellipsis menu (2) has “Edit” (rename or delete the lecture) and “Delete” options.
Assigning subjects to a lecture
Section titled “Assigning subjects to a lecture”Click “Add subjects” (or “Edit subjects” once a lecture already has some) on a lecture’s card to open a checklist of every subject in the graph. Check the subjects that belong to this lecture and submit. This replaces the lecture’s full subject list with your selection.
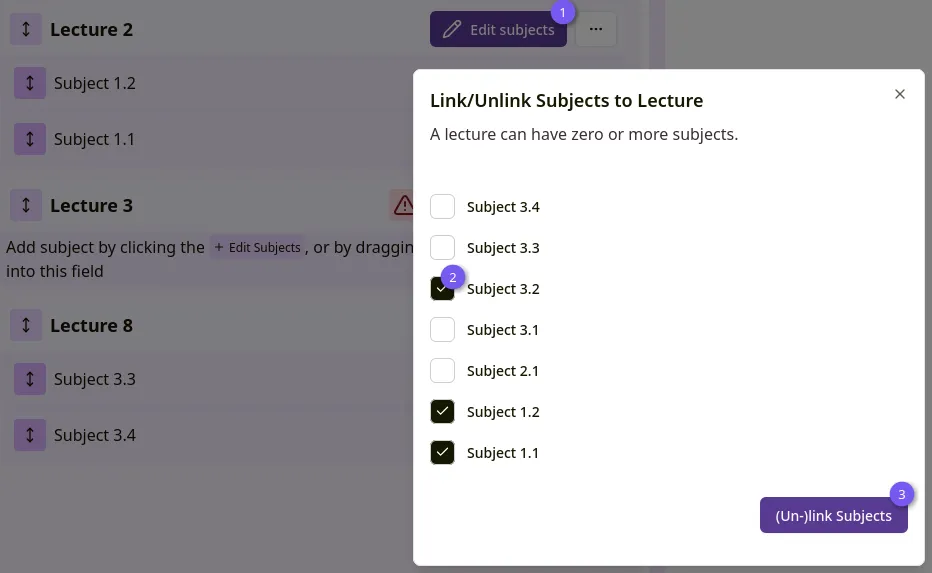 Figure 4: Assign subjects to a lecture
Once a lecture has subjects, you can also reorder them by dragging within the lecture’s card, or drag a subject from one lecture directly into another to move it across.