Links
A link (or “alias”) lets you share a graph with anyone, without giving them edit access or requiring them to log in. Links can also be embedded as an iframe in another website.
Creating a link
Section titled “Creating a link”In the course settings’ (1) graph table click the “Link” (2) button next to a graph, and give it a short name (up to 12 characters, letters, numbers and -
only).
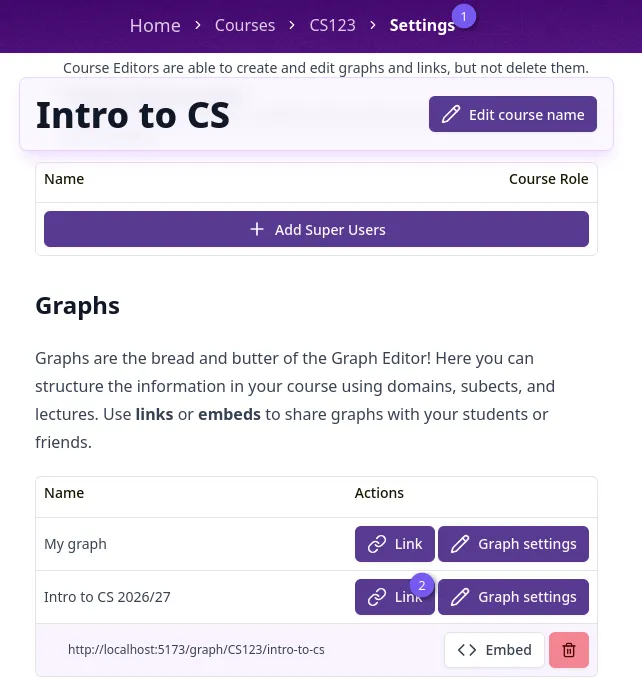 Figure 1: Create link
The resulting public URL is {course code}/{link name} under the app’s /graph/ path, for example
/graph/WBMT1050/exam1. Anyone with this URL can view the graph but cannot edit it.
Managing links
Section titled “Managing links”A graph’s links are listed in the course settings’ graph table as sub-rows, showing the full shareable URL.
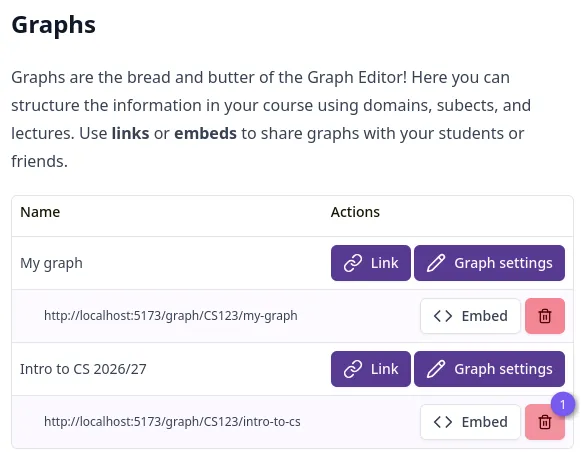 Figure 2: Link table
Embedding a link
Section titled “Embedding a link”Click “Embed” next to a link to get an <iframe> snippet you can paste into another page, for
example a Brightspace module.
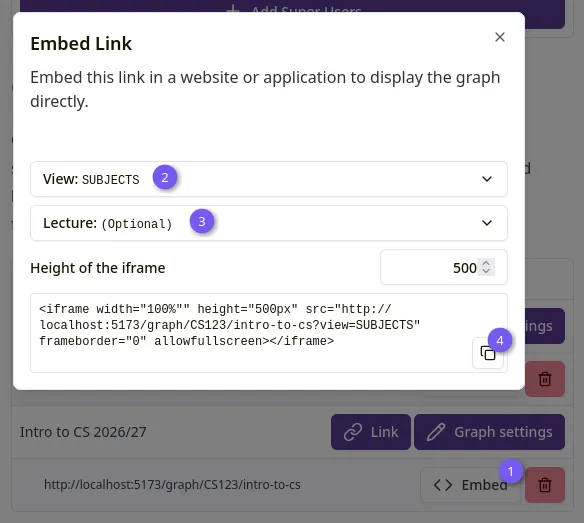 Figure 3: Embed link
Choose which view to embed (Domains, Subjects, or Lectures if the graph has any), optionally scope it to a single lecture, and set the iframe’s height. Copy the generated snippet with the copy button.
What visitors see
Section titled “What visitors see”Visiting a link’s public URL shows just the graph itself, in read-only mode, with no course or graph editor chrome around it. If the link doesn’t exist, visitors see a “Graph not found” page.